GitLab Web Editor
Sometimes it's easier to make quick changes directly from the GitLab interface than to clone the project and use the Git command line tool. In this feature highlight we look at how you can create a new file, directory, branch or tag from the file browser. All of these actions are available from a single dropdown menu.
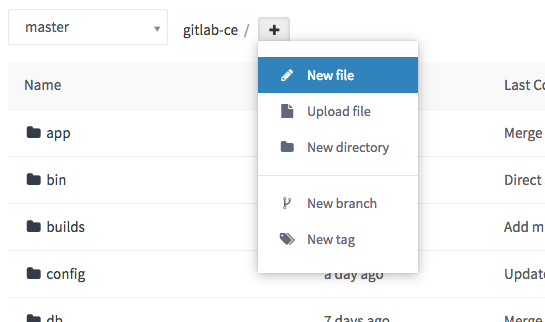
Create a file
From a project's files page, click the '+' button to the right of the branch selector. Choose New file from the dropdown.
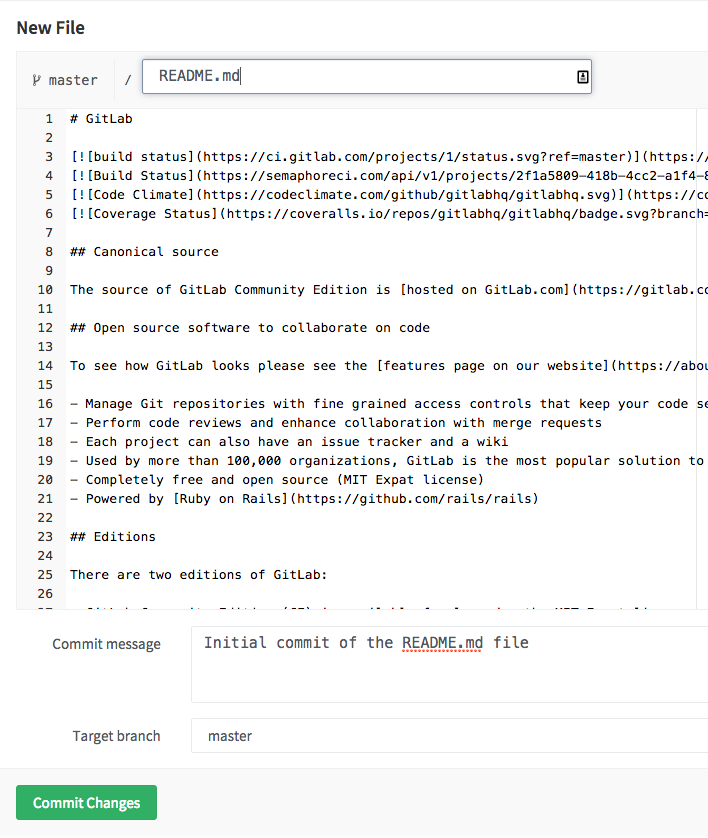
Enter a file name in the File name box. Then, add file content in the editor area. Add a descriptive commit message and choose a branch. The branch field will default to the branch you were viewing in the file browser. If you enter a new branch name, a checkbox will appear allowing you to start a new merge request after you commit the changes.
When you are satisfied with your new file, click Commit Changes at the bottom.
Upload a file
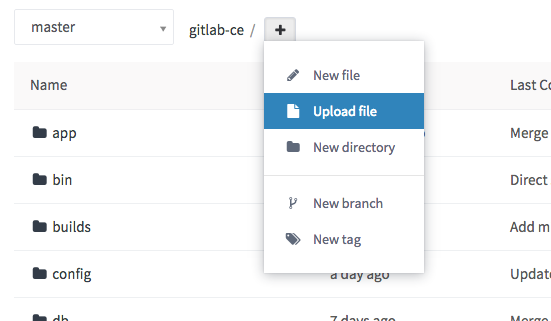
The ability to create a file is great when the content is text. However, this doesn't work well for binary data such as images, PDFs or other file types. In this case you need to upload a file.
From a project's files page, click the '+' button to the right of the branch selector. Choose Upload file from the dropdown.
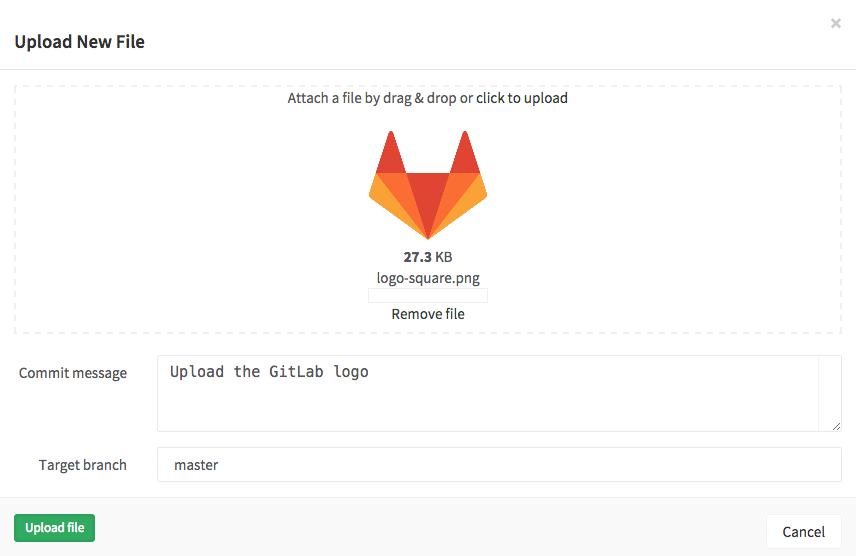
Once the upload dialog pops up there are two ways to upload your file. Either drag and drop a file on the pop up or use the click to upload link. A file preview will appear once you have selected a file to upload.
Enter a commit message, choose a branch, and click Upload file when you are ready.
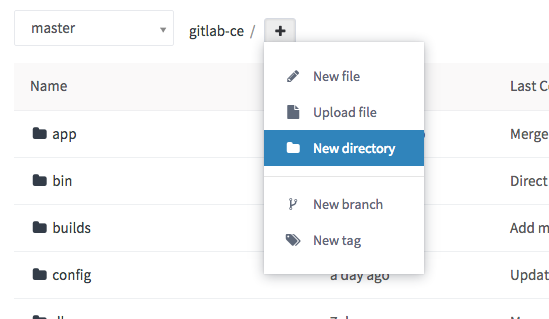
Create a directory
To keep files in the repository organized it is often helpful to create a new directory.
From a project's files page, click the '+' button to the right of the branch selector. Choose New directory from the dropdown.
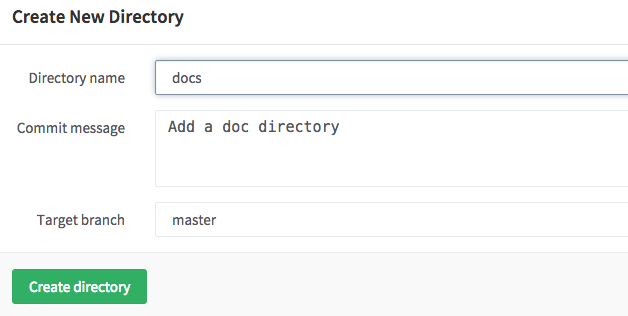
In the new directory dialog enter a directory name, a commit message and choose the target branch. Click Create directory to finish.
Create a new branch
There are multiple ways to create a branch from GitLab's web interface.
Create a new branch from an issue
Note: This feature was introduced in GitLab 8.6.
In case your development workflow dictates to have an issue for every merge request, you can quickly create a branch right on the issue page which will be tied with the issue itself. You can see a New Branch button after the issue description, unless there is already a branch with the same name or a referenced merge request.

Once you click it, a new branch will be created that diverges from the default
branch of your project, by default master. The branch name will be based on
the title of the issue and as suffix it will have its ID. Thus, the example
screenshot above will yield a branch named
2-et-cum-et-sed-expedita-repellat-consequatur-ut-assumenda-numquam-rerum.
After the branch is created, you can edit files in the repository to fix
the issue. When a merge request is created based on the newly created branch,
the description field will automatically display the issue closing pattern
Closes #ID, where ID the ID of the issue. This will close the issue once the
merge request is merged.
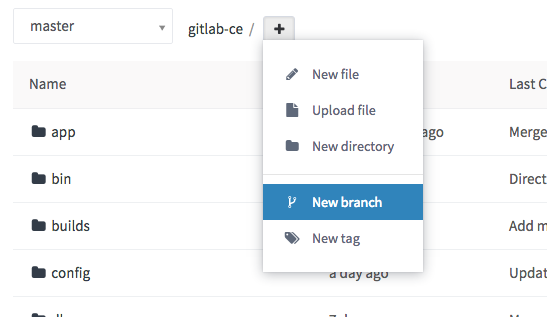
Create a new branch from a project's dashboard
If you want to make changes to several files before creating a new merge request, you can create a new branch up front. From a project's files page, choose New branch from the dropdown.
Enter a new Branch name. Optionally, change the Create from field to choose which branch, tag or commit SHA this new branch will originate from. This field will autocomplete if you start typing an existing branch or tag. Click Create branch and you will be returned to the file browser on this new branch.

You can now make changes to any files, as needed. When you're ready to merge the changes back to master you can use the widget at the top of the screen. This widget only appears for a period of time after you create the branch or modify files.

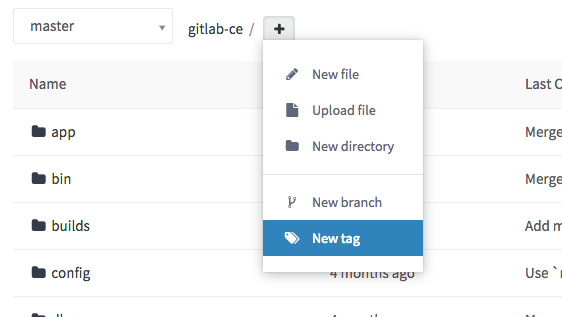
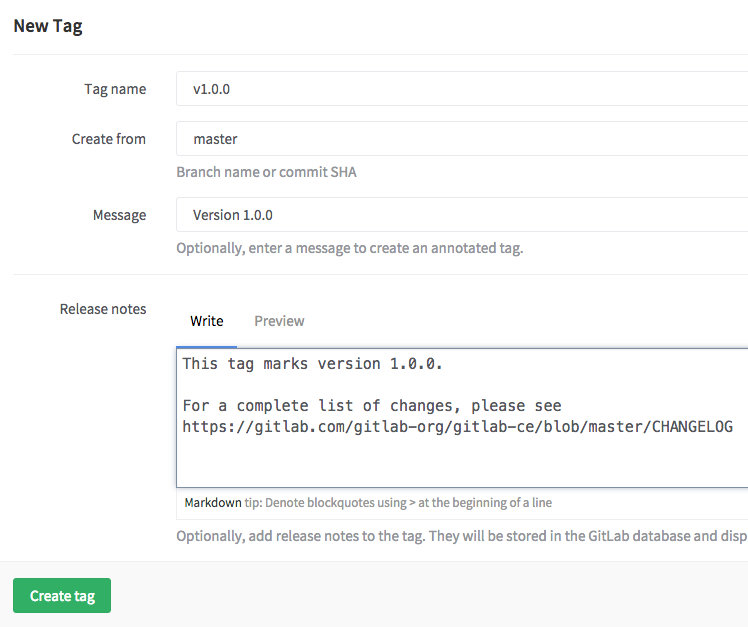
Create a new tag
Tags are useful for marking major milestones such as production releases, release candidates, and more. You can create a tag from a branch or a commit SHA. From a project's files page, choose New tag from the dropdown.
Give the tag a name such as v1.0.0. Choose the branch or SHA from which you
would like to create this new tag. You can optionally add a message and
release notes. The release notes section supports markdown format and you can
also upload an attachment. Click Create tag and you will be taken to the tag
list page.
Tips
When creating or uploading a new file, or creating a new directory, you can trigger a new merge request rather than committing directly to master. Enter a new branch name in the Target branch field. You will notice a checkbox appear that is labeled Start a new merge request with these changes. After you commit the changes you will be taken to a new merge request form.
